Building Routing Website for my Projects in Hours
How I used my current tool set Claude Code, Cursor IDE to build a project portfolio routing site in a single day—from initial idea to deployment in 8 hours.
These are my process steps of building a simple, yet dynamic routing page for my projects in under 8 hours, using Claude Code and Cursor IDE as my development partners. The goal: a clean, professional landing page that showcases my various projects, easy to extend without a database and links for visitors to the live deployments.
Here are the steps:
1. Project Kickoff
Starting with an empty directory, I initialized a Next.js project:
npx create-next-app@latest .
npm run dev
This created the foundational Next.js structure with everything needed to get started.
2. Tool Setup
Normaly if you are new you would also have to configure the development environment, but my Cursor IDE and Claude Code CLI are already set up. I checked available skills using /skills. The initial output was empty, so I added the frontend-design skill from the official Anthropic GitHub repository via /plugin. After a restart, the skill was available.
For visual direction, I downloaded reference sketch into docs/design/references/. These provided a clear aesthetic target without dictating content.
3. Design System Creation
I entered planning mode and prompted:
"Analyze the codebase and reference images in docs/design/references/. Create a complete design system in docs/design/ with style guide, design tokens, and component specs tailored to our tech stack."
The frontend-design agent generated a comprehensive design system in about 7 minutes (40k tokens). This included:
- Phase 1: Design tokens—foundational variables for colors, typography, and spacing
- Phase 2: Style guide and README
- Phase 3: Component specifications for typography, layouts, and cards
I reviewed the generated documentation, made adjustments to align with my vision, and finalized the specs in docs/design/. The full spec creation took 11 minutes with 110k tokens.
4. Custom Subagent
I created a dedicated "frontend-designer" agent via /agents:
"Call this agent Front End Designer. This agent is responsible for ensuring that the application follows the correct design system. It needs to reference the design system in docs/design/. This agent is allowed to make edits itself. If asked to review a design, it should return a detailed response. If asked to review and allowed to make edits, it can edit directly itself."
I assigned all available tools, selected the Opus model, chose a color for identification, and saved it to .claude/agents/.
A quick npm install ensured all dependencies were current. At this point, I kicked of the project planning.
5. Implementation Planning
Back in planning mode, I outlined the requirements:
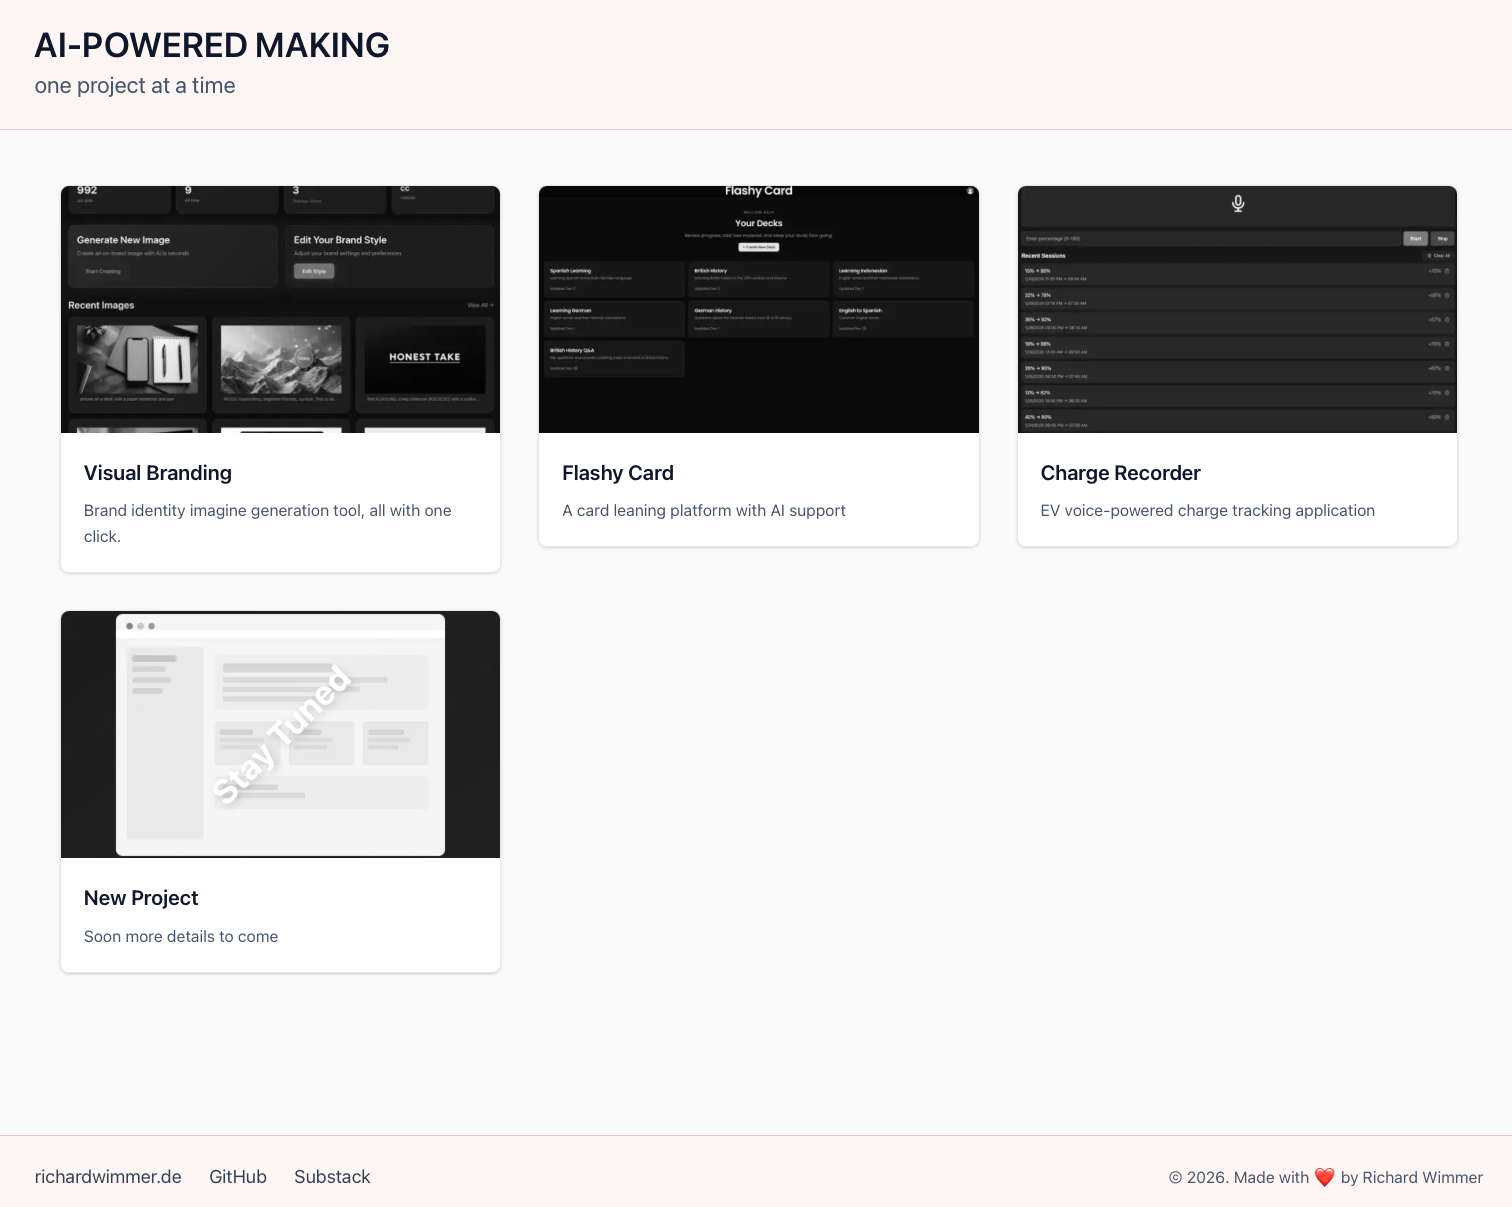
"Help me plan a website to demonstrate my past projects and link them together. The header should simply say 'Richard Wimmer Projects.' The main page shows different projects as grayscale pictures with brief descriptions. On hover, pictures colorize; clicking navigates to the project's URL. The footer should have minimal links to my personal site, GitHub, and Threads."
The agent asked follow-up questions:
- Storage: JSON vs. database vs. headless CMS → I chose simple JSON for simplicity
- Sample projects: I provided three placeholder names for the layout
- Image style: I chose a mix of photos and illustrations
Rather than auto-accepting and losing context, I asked the agent to store the implementation plan for reference during coding.
6. The actual Building of the Site
Again the actual coding was also done in under 15 minutes. I didn't use an orchestrator approach or specialized code agents as it is a smaller project and I was sure I won't run out of context window. Instead, Claude created a task list and worked through it systematically. The build completed without errors. The dev server showed only minor issues, which I resolved through conversational prompts to adjust the styling to my preferences.
The site was now functional—live and ready to use. This for me is again planning and breaking down the steps is so important.
7. Extension: Image Optimization Skill
To improve performance, I wanted project thumbnails cached locally as WebP files, which are really small file formats. I created a custom skill for that:
- I copied the skill creation template from the official Claude Code documentation
- In planning mode, I prompted: "Create a skill that downloads an image from a URL, resizes it to 800x600, converts it to WebP, and stores it in public/cache/"
- The agent generated
skills.mdwith underlying Python scripts - After restarting Claude Code,
/skillsconfirmed the new skill - I used
/cache-image <url>to process three project thumbnails
This was so fast and easy without going thru other 3rd party tools or platforms. The result: faster page loads with optimized, locally-cached images.
What Did I Build
A clean, minimal routing page that serves as a hub for my projects. Each project is displayed as a card that colorizes on hover, with an admin panel for easy updates by saving it to git and that gets automatically re-deployed. A larger portion of time was searching for the layout form, instruction, some debugging on the deploying side, but the code generation for the tool was done maybe in total of the hours project work in less then 30 minutes. It is astonishing how powerful new agents like Opus 4.5 are and what intelligent choices they make when you work close with them and leading them in the right direction.